How to enable Social Login using Twitter, in your Bubble app
Make it easy for your customers to login in your Bubble app, using their existing Twitter account.
Hi there,
I’m going to set up Social Login using Twitter for my SaaS house chore roster site, and I’ll write it up in this article, so that if you want to do something similar, you can get there quicker.
If you wanted an article about how to set this up with Google login, then see here.
Why?
People are tired of managing passwords. I know I am. I have a password management system which works well, but sometimes I just want to click Signup with Twitter, and not think too much more about it. Of course, every bit of convenience is trading away a little privacy, but most people are used to this trade off by now, and not having to think of a password is a little bit less friction in your new customer sign up flow.
OK, lets get into it.
Prerequisites
A Bubble app
A Twitter account
The Docs
I’m using the Canvas templates from Airdev, which I’ve chosen to make it easier to quickly release a nice looking app, with a decent chance that it will also be responsive. This article will show you many canvas specific steps, but I’m confident that it will still be useful if you aren’t using Canvas. The main parts are just a Button, and some Twitter config. Even if you aren’t using Bubble, the sections below taking about the Twitter Dev Console will still be relevant.
The Canvas docs are here https://docs.airdev.co/canvas/ and at the top right is a search box, into which I typed : Social
This resulted in this:
which links to https://docs.airdev.co/canvas/canvas-functionality/reference/reusable-elements/signup-login so lets work through that. It looks like there is a reusable popup element in the header, which makes sense because you want to login/out from any page.
Locating this in my bubble app
The popup comes pre loaded with several Social Login buttons, but within a group that is hidden by default. This means that by default, the a new customer will be required to type in their email address plus a password of their choosing.
This works fine as is, due to all the workflow items you get for free when you use canvas templates.. you can see why I like them. I’m all about saving as much time as possible in getting to launch day.
What I’ll do next is locate the twitter button and unhide it. A search for ‘twitter’ in the top left search field locates …. nothing… what??
It turns out that the options Canvas provide are Email, Facebook, Google & Linkedin. No matter, as there is Placeholder item which we can repurpose. Generally we’d want to copy this placeholder item but for now I’m going to just edit it in place, as I’m intending to have a total of 3 Social Login options, and this means I don’t need to refactor the size of the group they are within.
So, to make it visible and good looking:
Rename this group to Group Twitter
Enable the checkbox for ‘This element is visible on page load.
Copy and existing button [i.e the google one] into this group
Change the Text to be Sign up with Twitter
Change the colour to match the Twitter blue
Note: How do I know which blue? I use a chrome plugin called ColorPick Eyedropper, so just start up the Twitter web app using Chrome, click on the extension, then click on the Blue Tweet button, and it will tell you that it is colour 1DA2F1
You’ll now have something that looks like this:
Fancy.
The Plugin
There is no action out of the box for Social Login using Canvas, so we’ll wire this up ourselves.
Lets see if there is a plugin for Twitter.
Plugins | +Add plugins | Search for a plugin.. | Twitter
Looks like there is a ‘login in’ one, that Bubble created, so that’s the one we’ll use.
Click Install, the Done
Now locate this plugin in the ‘Installed Plugins’ view and have a look.
There are the fields we’d expect for a plugin that interacts with an API on a remote site, i.e it wants keys and secrets. We’ll be creating these shortly.
Click on the top right where it says Service page, which takes you to https://developer.twitter.com
The Twitter Developer Portal
Sign in using your twitter credentials.
Note, this annoyingly redirected me to the main twitter page, so just go back to https://developer.twitter.com/ if necessary
This portal art first glance has a lot of content, but I found it pretty hard to locate how to actually set up some API keys. To save you this time, I recommend just going to :
https://developer.twitter.com/en/portal/dashboard
It turns out that you need to ‘apply’ to use this console, then they will either approve or reject your application.
Go through the setup wizard on that page. I chose ‘Professional’
then Building consumer products
then Get Started
The next section is just filling out various details about your Twitter username, phone number, support email & whether you are applying for a team or an individual account.
Further parts of the wizard relate to your intended use, and agreeing to their terms. I don’t have the full details of this step as I applied in the past, waited some days for approval, forgot about it, then when I checked there today my portal access was available, so hopefully it’s an easy time for you too. I seem to recall selecting the V2 version of their API, rather than the V1, as I generally prefer modern versions of things as they are more future proof, so the rest of this article assumes you’ve gone down the same track.
Note: I recommend reading any terms and conditions and sticking to them. If your app integrates with any external services [i.e twitter], then you have a hard dependency on them, which adds vulnerability. The tradeoff is convenience and speed to market which is great, but make sure to not diverge from how they’d like you to use their service.
Project
Lets set up a Project in this Twitter dev console, which will hold the configuration related to your app. Project are required in order to interact with the V2 of the Twitter API.
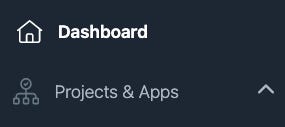
Go to https://developer.twitter.com/en/portal/dashboard and click Projects & Apps
then +Create Project
I think you can only have one Project, which then can contain many ‘apps’ so I’ll name the project very generically. I choose TwitterProject. A terrible name but it’s unlikely a customer will ever see it, so don’t worry.
Click Next
Fill out the description field based on your planned use of the platform & click Next
Fill out the Description field about your project & click Next
then Click Create a new App instead
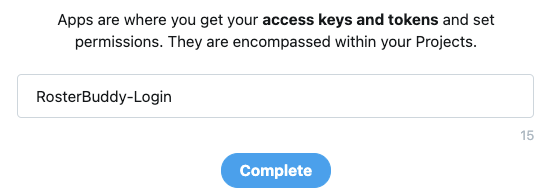
Give it a name. I’m choosing the name of my SaaS product plus the intended use, to make it easier to identity if I add apps over time.
Note: this step mentions ‘access keys and tokens’, so we are getting closer to being able to fill out those fields in the Plugin configuration screen.
Click Complete
You will now be taken to the next screen which shows the status of your new Project/App i.e:
and in the contents pane you will be presented with:
API Key
API Secret Key
Bearer Token
Be sure to copy and store these in a secured password management system. It is common for API key console UI’s to not display some or all of these items again. In fact, the UI warns you of this at the top:
At the bottom of the page is this:
but we’ll leave that for now, as the Twitter Plugin is only asking for a Consumer key and a Consumer secret. These names don’t match what we were just given in the developer portal, and this is a trend I keep seeing.. a mismatch between names for the same thing. They say naming things is hard, and it is true.
Twitter have a useful doc here which clarifies various names:
Client credentials:
App Key === API Key === Consumer API Key === Consumer Key === Customer Key ===
oauth_consumer_keyApp Key Secret === API Secret Key === Consumer Secret === Consumer Key === Customer Key ===
oauth_consumer_secret
Back to the Bubble app | Plugins | Twitter
Put the value of the API Key in to the field Consumer key
Put the value of the API Secret in to the field Consumer secret
Click out of the Plugin settings page to Save, i.e Click on the Design tab
Finding this article useful? If so, please consider sharing it:
Wire it up
So, lets create an action for that button we set up at the start.
Select the Sign up with Twitter button and click Start/Edit workflow
Add an action of Signup/login with a social network
Select Twitter
It is on this list due to us having previously installed the Twitter Plugin
Want access to more articles like this?
Did you know that some of my posts are published for paid members only? Access all past and future exclusive content by subscribing:
Run your app and navigate to your signup page
You should see something like this:
Click the Sign up with Twitter button
nasty error:
What!??
SideNote
So, why am I including this ‘broken’ aspect as part of a tutorial, when I could have just got it working, then come back and edited this article to look more ‘perfect’.
Getting things working is hard, especially when integration multiple services with each other [your site and the twitter site], and even the best written tutorial will probably be out of date soon, as the environment changes around it. Being able to see error messages then work out what to do is often the most important skill. When faced with hurdles, just take breath, gather information about the context, and go googling. You’ll soon be back on track.
Next steps
ok. that error message has a number which is 417. From experience I know that is likely an http error code. For info look here https://developer.mozilla.org/en-US/docs/Web/HTTP/Status/417 and for entertainment look here https://http.cat/417
I love http.cat. If you are dog person then look here https://httpstatusdogs.com/417-expectation-failed
So it looks like the remote site [twitter] found that the request we sent, did not match expectations. Lets go back to the twitter dev console, and follow along the wizard a bit further.
At the bottom of the screen, there was that section about ‘setting up your app’
In there, click 'enable 3rd party authentication’
This just takes us to the Project page.
Within the Apps section, click the Settings cog icon
Scroll down to the Authentication settings section and you’ll notice that something called 3-legged OAuth is currently disabled, and that it mentions ‘OAuth for Sign in with Twitter’. This is what we want, so click the Edit button in this section
We need to fill in some values on this form [similar to how we did for the Google Login article] regarding callbacks, terms, privacy etc.
Enable 3-legged OAuth : click the toggle switch to enable this
Request email address from users : click the toggle switch to enable this
Callback URLs (required) : type in the full url of the page that you want your customers to be directed to in your app once they have completed the sign up process.
- more info hereWebsite URL : add your website url, taking care to record it accurately regarding whether it has a www or not. In my case it is https://rosterbuddy.app
Organisation Name : this is optional, but I’m putting RosterBuddy
Organisation URL : this is optional, but for now I’m putting https://rosterbuddy.app/faq
These last 2 are commonly required for integrating with other sites, so write some up if you don’t have them yet.
Terms of Service : https://rosterbuddy.app/terms
Privacy policy : https://rosterbuddy.app/privacy
Click Save
Run your app and navigate to your signup page
You should see something like this:
Click the Sign up with Twitter button
Yay, we are now directed to a page hosted at https://api.twitter.com/..
Note: Although it’s always odd to be redirected off your own site to perform an action, but I think many people are used to this flow as part of login and/or payment transactions.
If the user going through this process isn’t currently logged into Twitter with the same browser software, they will be prompted to provide their login credentials in order to process this sign up request:
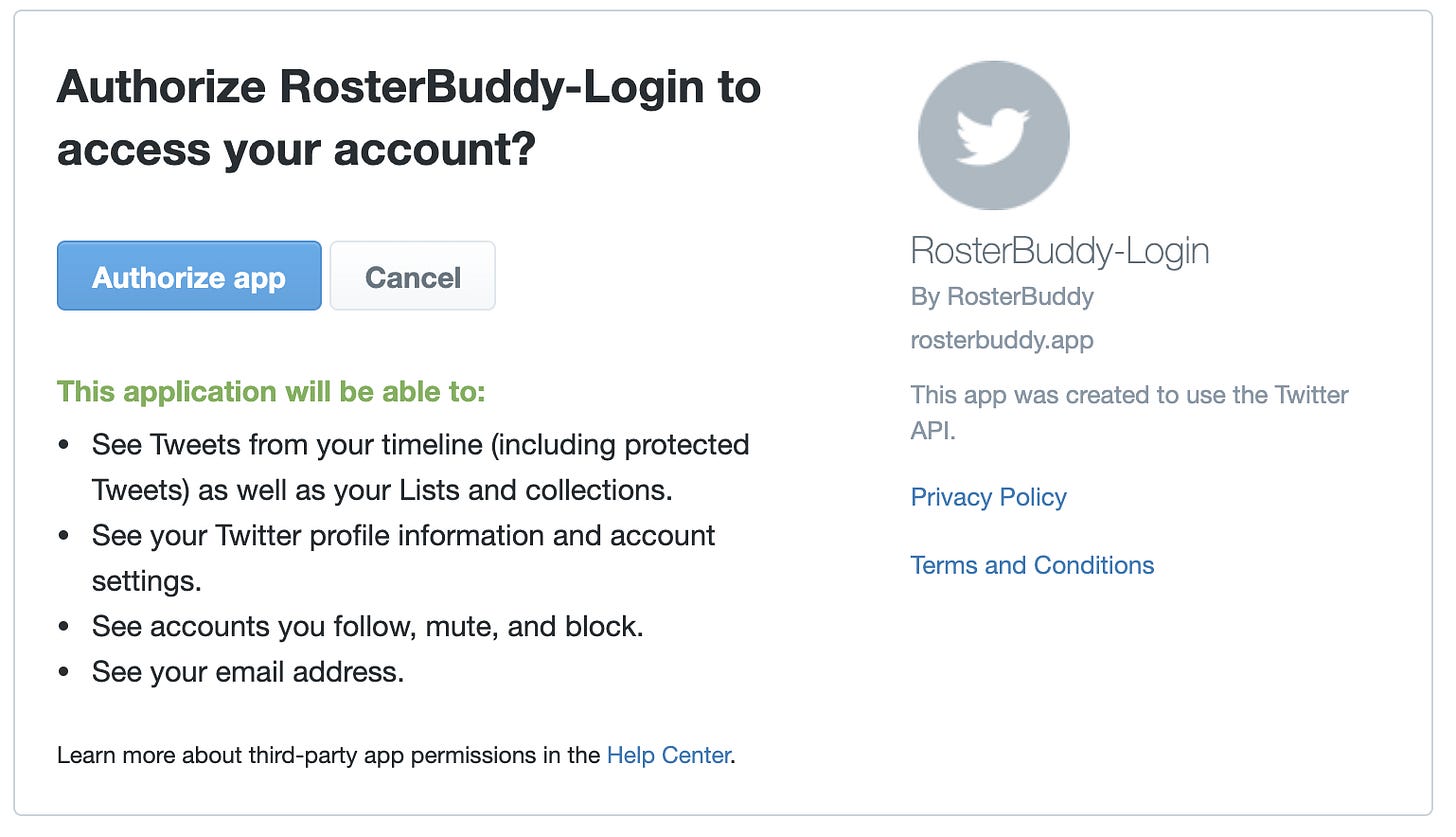
If however the user is already signed in to Twitter with the same browser, then they are just asked to ‘Authorize app’
After agreeing to this, you be authenticated by Twitter, then redirected to the url you specified in the callback url section *(see problems section below)
Result
You will now have a newly logged in session for this user in your app, which was authenticated by Twitter, meaning it was easier for your customer to sign up.
This user record now exists in your Bubble database in the User data type.
You’ll be able to enrich the user record for this person by accessing various attributes of Current User’s Twitter’s … as per
Note: that thing there called “Handler” seems like a typo from the plugin author.. it refers to the Twitter “Handle”. It’s also possible though that these fields are auto-populated based on what the Twitter API is returning, so maybe Handlers is set at their end.
The customer has awareness of which app’s they have authorized by viewing the settings within their Twitter account
Login
For users who return to your app in the Future, just create a Login with Twitter button ( as opposed to Sign Up), and for the action, just use the same Action i.e Signup/login with Twitter, and select Twitter from the OAuth provider dropdown menu.
The Plugin will work out it is a sign in activity.
Problems
I encountered quite a few problems in setting this up, and this matches comments I’ve seen about the Twitter API being difficult to work with. There are a few outstanding issues I’ll keep working on:
CallBack Url
I found that the behaviour of the call back from Twitter didn’t match their settings UI. I expected that after authentication that Twitter would redirect the user to my welcome page at https://rosterbuddy.app/welcome, however during testing, all I got was errors about the callback url not being correct. If I added the url of the login page https://rosterbuddy.app/login in the callback url field, then everything was fine… except that the user was then directed back to /login, rather /welcome. I’ve had to handle this on the app side using a workflow based on the ‘Page is Loaded’ event. This isn’t ideal, so I’ll do some more testing.
Email Address
Twitter is not returning the email address, despite me having configured it to do so in the Twitter dev console
I have supplied the privacy policy and terms links in the console which is a requirement to receive the user email address. @creativiii on Twitter has suggested that the Twitter team may need to review and approve this part of the config, so I’ll leave it a few working days then recheck. For now the Bubble user record’s Email field for Twitter logins is empty, which is odd, but the signup/login process still works.
*Update: the lack of email address seems to be a limitation of the bubble plugin. I may set up similar functionality using the bubble api connector, and write it up. Let me know in the comments if you are interested in this as an option
FirstName LastName
My Bubble User db has fields for First, Last, and First Last, which I use within the app and emails. The Twitter API seems to return only “Name” which seems to match the Displayname of the Twitter profile. Hard to know how to handle this one as the customer might have put anything in that field. For now I’ll just be putting this in the ‘First’ field
OK, that’s it folks, I hope you found that helpful. To keep track of what articles I may write next follow me on Twitter at @MartyLindsay_NZ


