Making a Bubble app that uses the Dad Jokes API
Here's how to integrate Bubble.io with a simple API and get a laugh for free
API’s are the front door of web services and they allow computers to talk to other computers to send and receive information. If you are building Bubble apps then sooner or later you’ll want to incorporate information from other sites automagically, and APIs are the way to do it. In this article I’ll explain how we can integrate Bubble with the Dad Jokes API, because Dad Jokes are the best jokes.
This particular API doesn’t have security requirements so it’s a good starting point for learning about API’s.
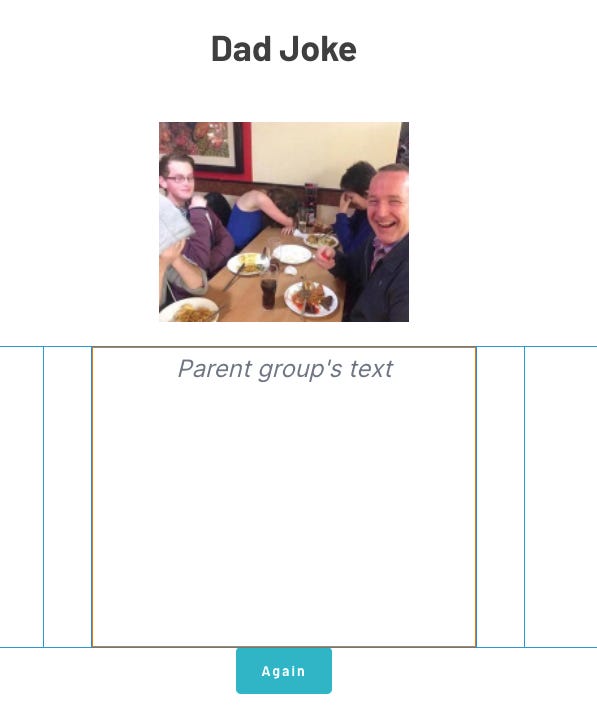
We’ll be building an app like this:
https://api-samples.bubbleapps.io/version-test/dad-joke
This post is brought to you by DocuPotion
DocuPotion is the PDF plugin Bubble devs love to use. It gives you total control over the design of your PDFs and makes creating beautiful PDFs easy.
Want to create simple invoices? DocuPotion can do that.
Tired of dealing with page breaks that don’t work? DocuPotion has detailed page break controls.
Already using a PDF plugin but can’t run it in the backend? DocuPotion allows you to generate PDFs in backend workflows.
Want to generate a detailed 40-page report with graphs and charts that delights your users? No problem - DocuPotion can generate large PDFs without issue
The API
The API we’ll be working with is at https://icanhazdadjoke.com and its docs are here https://icanhazdadjoke.com/api. Let’s have a walk through the relevant sections of their docs.
Authentication
The authentication section of their docs says no authentication is required, which makes it simple to work with. Often with API’s there is a requirement to sign up, generate keys, be subject to rate limits, and for higher volumes of calls - pricing implications.
Note: Future articles of mine will include different authentication methods, including oAuth.
Response Type
There are 3 data types they provide, and although plain text is probably suitable for this simple use case, I prefer working with json as it has a hierarchical structure and is a common API response format.
text/html - HTML response (default response format)
application/json - JSON response
text/plain - Plain text response
Custom User Agent
The nice people who own the dad jokes API are providing free access, but they still want to monitor usage, so they request we add a customer identifier, which will just be the name of the bubble app url.
Endpoints
An API will often be implemented with multiple endpoints, which serve different purposes. For example you might call a recipe API which has a get-recipe endpoint, and a separate get-ingredient endpoint. For the Dad Jokes one their primary endpoint already provides a random joke, which is the one we’ll use.
GET https://icanhazdadjoke.com/
The API Connector
We’ll need to install the ‘API Connector’ plugin to our bubble app, so head over to the Plugins Tab, search for API Connector and click Install
Clicking Add another API shows the setup screen where we’ll configure the connection
The configuration has two main sections, one for the initial setup from your app to the API, and then individual sub sections related to each call to the API
Initial Section
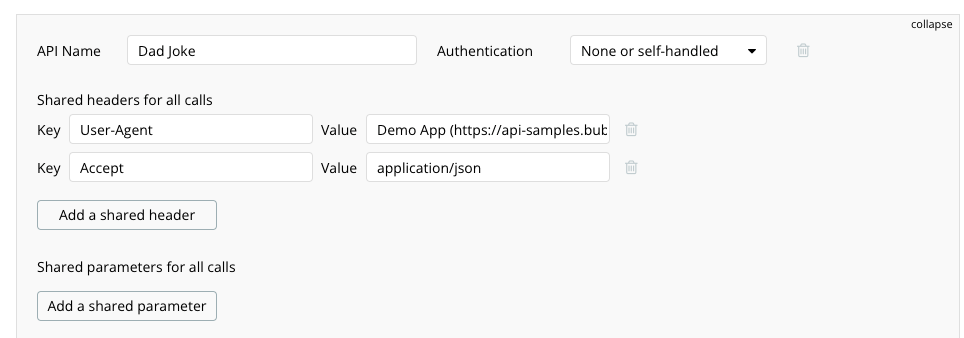
The initial section needs to be similar to this:
Note, for the text that is cut off, it has this value:
Demo App (https://api-samples.bubbleapps.io/version-test/dad-joke)
but for your app, change it to match your app url or name.. this can be any value you like, but make it easy for the Dad Jokes API owner to identify the site.
The Call Section
I have this config for the GET call:
Once you have this set up, you need to click the Initialize call button
Note: once you’ve done that, the button will change to Reinitialize call, as in the screenshot above.
If your config is successful, your Bubble app will initiate an http GET request to the remote Rest API, interact with it as per your settings, and then return data. You’ll then be shown the response data, and you have an opportunity to define the datatype for each field, in order for Bubble to classify it correctly.
Example:
Additionally, you could click on the Show raw data link if you wanted to see the json data itself:
If all is well then click Save
OK, we now have a working API connection. Now lets wire up the UI
The UI
Bubbles new responsive engine is still in beta mode, so we need to convert each page to use the responsive engine via the Upgrade responsive (beta) button on the Design tab
Since this article isn’t about the UI design itself, I’ll refer you to other resources such as Matt Neary’s article here https://medium.com/@mneary/understanding-responsiveness-in-bubble-421fb7ed402c to get up to speed with the new engine.
The main functional components of the app are a button to trigger the API request, and a Text element to display the results.
The text element displays the Parents group text, which I’ve configured like this:
which as you can see is not very configured… it’s just defining text as the type of content.
So how do we populate this with the data from the API?
Workflows
We need to cover two cases for loading a joke. One is when the page first loads, where we want a joke already displayed ready for your larfs. The other case is when the customer wants to load a new joke and get double larfs.
Good times.
On Page Load
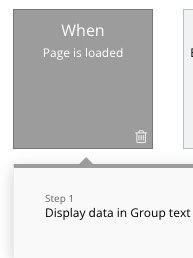
Set up a Workflow like this:
This will result in the page load event triggering this action, which uses the API connection you configured above to reach out to the dad jokes API with a https GET request, which returns the json response, for which there is a joke item as per the json payload we saw earlier
This joke text is sent to the Group as per the Display data in Group action, and the contained text element happily displays its parents data, which is the joke.
Easy.
Get another one
Once you’ve stopped laughing, you’ll want another one, so lets add this action to the button:
The simplest way to get a new joke is to trigger the page load action again, which is easy to do via the Refresh the page action. Since the UI items are cached by your browser, you don’t really notice a flash/gap/reload in the UI, you just get to see a new joke.
Job done.
Thanks for following along, I’ll be adding more API examples to this newsletter, and dealing with more complicated use cases including authentication, and adding oAuth logic so your customers can delegate access to your app for their own data in other services, which you can then display in that customers usage of your app.
p.s. If you want another API example, then see my article here.
For more resources about using the API Connector in Bubble, check my site FindNoCode.info.


